Adventures in Bondo
Goddamnit does Bondo stink. It's really bad.
It smells so bad, that it reminds me of an incident when I was in college, when my friend and I got drunk on potato vodka and rode our bicycles to the local mall. At the mall, we wandered into a Kay-Bee toy store. While we were in there, goofing around, my friend, Anton, cracked open a liquid glitterglobe that was on the end of a Little Mermaid pencil with Ariel inside. He proceeded to flick the glitterglobe juice on me. The juice had an odor that hit me almost immediately, and as a result, I laughed so hard I peed my pants. Now this sounds like a bizarre reaction, and without context, it is bizarre. Here's the context: I peed my pants because the liquid that came out of that globe that he flicked on me smelled like chemical death. It was so vile and toxic-smelling, all I could think was, "How badly will the children buying these pencils be contaminated?" Yes, I thought it was hilarious that a toy store could be so irresponsible.
I learned later that they actually make the juice toxic-smelling so kids WON'T consume it...
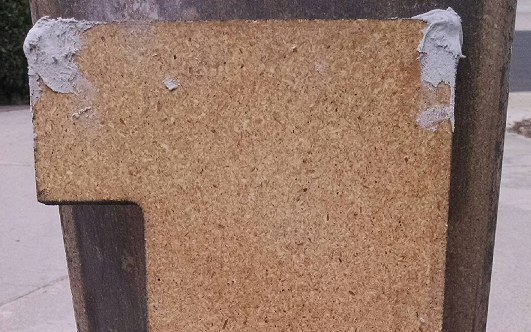
You may recall we were working on restoring a Randall RG 100 Original. From the pictures in that article, you may have seen that the front coverplate of the headshell (picture 1), after the old tolex had been removed, all 4 corners of the particle board had broken out.
The amp itself is not valuable enough to rehouse in a proper finger-jointed 9-layer birch marine plywood cabinet, and while, if we had the tools, it might have been cost-effective to buy a new piece of particle board and cut it to fit, we don't yet have those tools. So this became a Bondo restoration operation...
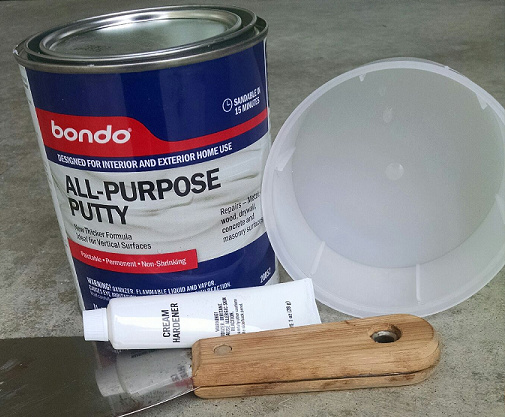
Like the "glitterglobe" from my past, Bondo also smells like chemical death. Unlike the glitterglobe, it can definitely poison you. Use this stuff outside. Using Bondo is pretty easy. It's managing the curing time, the mixing of the putty with the oxidizing agent, and the gloves... It's not hard to get the Bondo ready, just use the mixing directions on the can. What you won't be ready for is how quickly Bondo sets up. What I read on my can was "mix for two minutes, Bondo will cure in 15 minutes." 15 minutes seemed like plenty of time to do some prep and then come back. THE CAN LIES. Bondo will set up in around 5 minutes after mixing in the oxidizer. I spent 5 minutes doing some tape and came back and my first round of Bondo had set up. Fortunately I didn't make a lot.
Here's a list of things you'll need to have if you're going to be using Bondo on your own amp repair project:
- Disposable rubber gloves,
- A disposable mixing palette, like a paper plate,
- A disposable mixing stick; save old used popsicle sticks,
- A disposable plastic spatula
- A large, wide chisel
- A sharpening file
- Coarse (80 grit is fine) Sandpaper
- Blue painters tape
Notice picture #2 - more Bondo is on than what is immediately needed. This was to help create sharp corners later. Instructions will tell you to put on several thin layers at a time. This is unnecessary, and in hindsight, if I were to do this again, I would have used painter's tape on the corners to create wells with the tape to shove the Bondo in. Once it cures, take off the tape and shape to your heart's content.
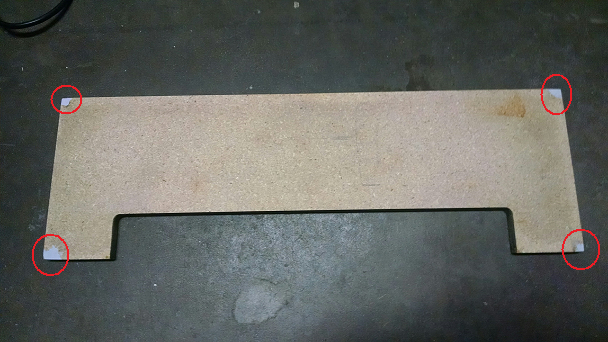
Picture #3 - What a difference! This took a lot more time than was probably necessary, but I did it according to the instructions - "Build up layers". Bondo cures quite hard and it was difficult to start off using sandpaper to shape. Ended up sharpening my chisel and using it. The chisel was so much better than sandpaper in removing excess Bondo material. NOTE: Don't try to chisel it all out. Shave off the Bondo in layers.
After removing all the excess cured Bondo from the corners, I couldn't help but note that once the corners had been filled out, the task of gooping them up looked far less daunting than it did when the broken corners needed fixing. Those broken corners looked a lot more intimidating. They looked like they were going to require a lot more Bondo than the now-filled corners show. Huge mental disconnect from what I expected from the task.
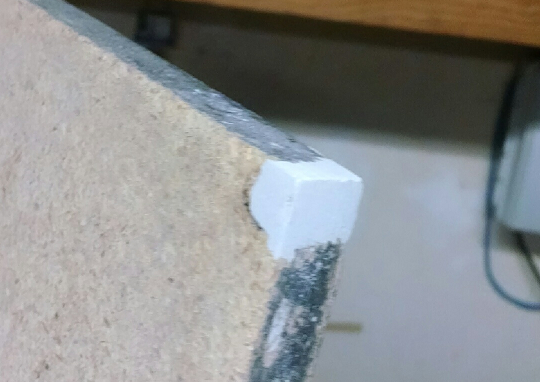
Picture #4 - Corner is shaped as if it were always a part of the original cut particle board. All this needs now is for the corner holes to be drilled and tolex applied. Success!
